hikcentral-door-access

How to Manage Hikvision Door Access Devices on HikCentral Professional

Time needed: 5 minutes

Before proceeding with this guide, ensure that HikCentral Professional is already installed on your server. If it isn't, please refer to our installation guide to set up the software first: How to Install HikCentral Professional

Follow this step-by-step guide to add Hikvision Door Access Control Devices on HikCentral Professional, and to manage the access control levels of users.

  1. Navigate to the Hikvision Access Control Module

    Open HikCentral Professional by entering the server IP address (or 127.0.0.1 if you are in front of the server PC). Then navigate to the Device menu at the top of the interface.

    From the HikCentral Professional interface, navigate to the "Device and Server" module. Choose "Access Control Device".

    Click on the "+" button to add a new device.

    Manage-Hikvision-Door-Access-Devices-HikCentral-Professional

  2. Add a Hikvision Door Access Device

    Choose the appropriate Access Protocol, Adding Mode, Device Address, Device Port and fill in the required device information like the device address, user name, and password.

    Click "Add" to add the device to HikCentral Professional.

    Manage-Hikvision-Door-Access-Devices-HikCentral-Professional

  3. Add Users to the HikCentral Professional Platform

    Select Person from the top menu, then click Person in the side panel, as shown in the image.
    To add a user, click the + button. If you have a list of users in Excel or CSV format, you can upload them in bulk.

    Manage-Hikvision-Door-Access-Devices-HikCentral-Professional

  4. Set Access Level Permission

    Navigate to the "Access Control" module in HikCentral Professional. Under the "Access Level" section, you can create, edit, and assign access levels to users or departments. Each access level determines the specific access points and schedules that users with that level can access. Assign the appropriate access levels to users or departments based on your organization's security requirements.

    Next, click Manage Access Level, then select + Add. Configure the access level for the door according to your requirements.

    Manage-Hikvision-Door-Access-Devices-HikCentral-Professional

  5. Assign Access Levels to Users

    Click Assign Access Level, then select Assign by Access Level.

    Next, click Assign to and assign users to the access level you just created.

    You can also assign users by department, individual user, or other options. Choose the method that best suits your needs for convenience and efficiency.


    Manage-Hikvision-Door-Access-Devices-HikCentral-Professional

This process allows you to add Hikvision Door Access Control Devices on HikCentral Professional, and to manage the access control levels of users.

How to View CCTV on HikCentral Professional

Time needed: 3 minutes

Before proceeding with this guide, ensure that HikCentral Professional is already installed on your server. If it isn't, please refer to our installation guide to set up the software first: How to Install HikCentral Professional

Follow this step-by-step guide to access and view live and recorded CCTV footage on HikCentral Professional.

  1. Access the Encoding Device List

    Open HikCentral Professional by entering the server IP address (or 127.0.0.1 if you are in front of the server PC). Then navigate to the Device menu at the top of the interface.

    From the left panel, click on Encoding Device under "Device and Server."

    If you are adding the local network Hikvision CCTV devices, you will see the list of connected encoding devices, including cameras. Verify that the camera's status is Activated and added to the system.

    If you are adding remote Hikvision CCTV devices, you can do so via domain name, or ISUP.

    how-to-use-hikcentral-cctv

  2. View Live Video Feed

    Go to the Video tab in the top navigation bar.

    In the left-hand menu, select Video Security.

    Locate the desired camera in the resource list. For example, "Camera1" will appear under the associated area or device group.

    Double click on the camera name. The live video feed will display in the right-hand panel.

    how-to-use-hikcentral-cctv

  3. Playback Recorded Video

    Stay in the Video tab and ensure Video Security is selected.

    Locate and select the camera you wish to review, such as "Camera1."

    At the top right of the interface, switch from Live View to Playback mode.

    Recorded footage for the selected camera will appear with a timeline at the bottom. Use the timeline to navigate specific time frames.

    how-to-use-hikcentral-cctv

This process allows you to efficiently monitor both live and recorded CCTV footage.

hikcentral

How to Install HikCentral Professional

Time needed: 3 minutes

HikCentral Professional is a comprehensive platform designed to integrate and manage Hikvision security systems effectively. Installing this software is the first step toward unlocking powerful features for managing CCTV, access control, alarms, and more. Whether you’re setting it up for the first time or reconfiguring an existing system, this guide will walk you through the process with simple, clear steps.

Before diving into the installation, ensure you have access to the necessary resources, including the installer file, system specifications, and a valid license key. By following this guide, you’ll set up HikCentral Professional quickly and efficiently, laying the foundation for robust security management.

Let's get started!

  1. Prepare Your System

    Before installation, ensure your system meets the minimum requirements for HikCentral Professional. This includes:
    A compatible Windows OS (e.g., Windows 10/Server 2016 or newer).
    At least 8 GB RAM and 200 GB of free disk space.
    A stable network connection.

  2. Download the Installer

    Visit Hikvision’s official website or click our Google drive link to download the latest version of HikCentral Professional. Save the installer file to your computer.

  3. Run the Installer

    Locate the downloaded file and double-click it to start the installation process.

    how-to-install-hikcentral

  4. Follow the Installation Wizard

    The installation wizard will open. Click “Install” to proceed. After that, choose your installation type:
    Full Installation: Installs all features, including server and client modules.
    Custom Installation: Allows you to select specific components.
    Also, set up the directory where the software will be installed.

    how-to-install-hikcentral

  5. Complete Installation

    Once the installation finishes, launch HikCentral Professional from the desktop shortcut. You will be asked to enter the admin user password, please create one and remember it. You will also be asked to enter SMTP details for the HikCentral server. You can do it now or later.

    how-to-install-hikcentral

  6. Activate and Login

    After logging in, you will need to activate your software using the provided license key. If you don’t have one, purchase HikCentral Professional from here with immediate delivery.

    how-to-install-hikcentral

That is it! Stay tuned for more guides on how to use HikCentral Professional software!

How to Create Hik-Connect Team and Use the Cloud Service

To use the Hik-Connect Team service, you will need to have basic Hik-Connect service in use now. Refer to How to Use Hikvision Hik-Connect on how to use Hikvision Hik-Connect

Time needed: 3 minutes

Hik-Connect Team is a cloud-based platform designed to simplify the management of multiple Hikvision security systems. It's particularly useful for businesses with multiple locations, such as retail chains, schools, or offices.

Here are the steps on how to create Hik-Connect Team and use the cloud service.

  1. Login the Hik-Connect account you just registered.

    If you don't have the account yet, refer to How to Use Hikvision Hik-Connect on how to register Hikvision Hik-Connect account
    Hik-Connect-Team

  2. Click "Service"

    After logging in, you will see the home page. Please switch to the "Services" tab at the bottom.
    Hik-Connect-Team

  3. Create Hik-Connect Team Service Now

    On the "Services" page, scroll down to find the "Create Team…" window.
    Hik-Connect-Team

  4. Click "Create Team" to Continue

    Tap on it to proceed, and then click the "Create Team" button on the next screen.Hik-Connect-Team

  5. Enter some details to create the Hik-Connect Team Service

    Fill in your Team name (the address is optional). Make sure the time zone is set corrently. (For Singapore, time zone is UTC+8). The phone number is optional. Then, select the scene type that best fits to your situation and click on "Next" button.
    Hik-Connect-Team

  6. Enable the service you need at Hik-Connect Team

    Tap to enable the service you need. For example, if you’ve installed CCTV, turn on "Video Management"; if you've installed Hikvision door access control system, turn on "Access Control & Attendance". Then, scroll down to the end of the page.
    Hik-Connect-Team

  7. Agree the terms and services to create Hik-Connect team service now

    Tick the box to agree the terms and services, click the "Create Team" button, and then click the "Next" button in the next screen.
    Hik-Connect-Team

  8. Hik-Connect Team Service Created

    Your team has been successfully created. You will be redirected to the "Services" page. From here, tap the "Home" tab at the bottom.
    Hik-Connect-Team

  9. Import or Add Devices to your Hik-Connect Team now

    If you already added the devices under the basic personal Hik-Connect account, click "Import Personal Device" button; if not, you can proceed to click "Add Device".
    Hik-Connect-Team

Hik-Connect Team offers a comprehensive solution for businesses seeking to efficiently manage their security systems across multiple locations. By providing centralized control, role-based permissions, and powerful features, it can help improve security, reduce costs, and enhance overall operations.

Hik-Connect-logo

How to Share Hikvision Device on Hik-Connect with Other Users?

Time needed: 2 minutes

If you're currently using Hikvision CCTV, door access, alarm, intercom, or any other system, and managing these devices through Hik-Connect, and now another family member wishes to access and control them too, what steps should be taken? The following provides a step-by-step guide on sharing Hikvision devices on Hik-Connect with other users.

  1. Find the Hikvision Device which you want to share with other users

    Click the icon "...", followed by the icon "share"

  2. Click "Share with User"

    As shown in the below image

  3. Enter the other user's Hik-Connect user account, or email address or mobile number which are registered at Hik-Connect

    The other user MUST register the Hik-connect account first before main user can share the device with him/her. If he or she doesn't know how to do that, please refer to Hik-Connect Usage Guide here.


  4. The other users shall accept the invitation from the main Hik-Connect user

    All good now. Enjoy the convenience brought by Hikvision Hik-Connect now!

Hik-Connect-logo-1

How to Reset Password of DVR NVR via Hik-Connect App

Resetting the password of a DVR/NVR system is important to ensure the security of the device and the recorded footage. The Hik-Connect app provides a convenient way to reset the password of a Hikvision DVR/NVR system remotely. Here are the steps to reset the password of a DVR/NVR system via the Hik-Connect app:

  1. Open the Hik-Connect app on your smartphone and login to your account.
  2. Tap on the "Me" tab at the bottom of the app screen
  3. Tap on the "Reset Device Password"
  4. Scan the QR code on the local device's GUI
  5. You will be shown a "Reset Code".
  6. Enter the reset code on the local device's GUI page.
  7. You will be prompted to enter the old password and the new password.
  8. All Done!

Note: It is important to keep the new password safe and secure to prevent unauthorized access to the DVR/NVR system. Also, it is recommended to use a strong and unique password that is not easily guessable.

Video guide can be found here: https://www.youtube.com/watch?v=2jk0ZTmpO2Y

How to Change Dahua CCTV Password on DMSS

Time needed: 2 minutes

Here's how to change the Dahua CCTV password on DMSS. Dahua door access, intercom, and alarm systems follow the same logic.

  1. Click the "..." on the right corner of the device which you want to change the password

  2. Click the top right edit icon

  3. Click " Modify Device Password". Then follow the instructions accordingly

hikcentral-logo

How to Share Hikvision Device on Hik-Connect with Installer?

Time Needed : 1 minutes

If you are using Hikvision CCTV, Door Access, Video Intercom, Alarm, or other systems, and looking for a Hikvision authorised support partner to provide technical support to you, here is how you can share Hikvision Device on Hik-Connect with them.
Prerequisite: you will need to add the device under a Hik-Connect account. The device status must be online.

  1. Find the device in the Hik-Connect App. Click the symbol in the top right corner.

  2. Click "Share with Service Provider".

  3. Either choose your existing service provider, or click "Add Service Provider"

  4. Enter the provider's email address and click "OK". Your service provider should have received the notification of the support request. They can help you troubleshoot remotely once they agree.

Tools
  • Hik-Connect App, Hikvision Devices

Quick Contact

CCTV Camera Promotion

Ready to Get Started? Contact us Now!

Send us a quotation request. We will get back to you within a few working hours.

+65-63279051

+65-81685916

support@safetrolley.com

60 Albert Street, #09-05, Singapore 189969

Technical Support | Remote Support | DownloadHikvision Hik-Connect | Hik-Connect Team | Hikvision ivms-4200 | Dahua DMSS | Dahua iDMSS/gDMSS | Dahua SmartPSS | Resources | CCTV Storage Calculator | Share Device on Hik-Connect with Installer | Share Device on Hik-Connect with User | PayNow Payment | Video surveillance system (VSS) for construction | PPE Detection

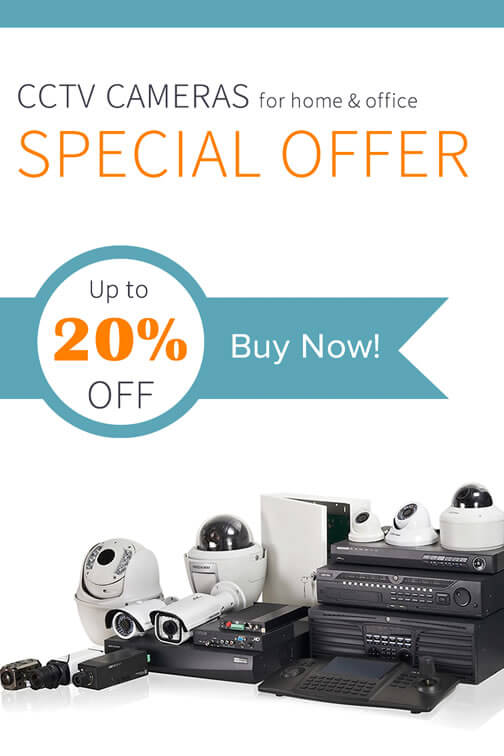
IP camera is the most reliable and accessible invention for foolproof security. Due to this invention, the surveillance system has become more reliable and secure. This technology has enabled you to connect the CCTV camera to the network. Now you can view the CCTV camera videos through a network from any location. IP camera Singapore also allows you to record the video on network drive. In many cases, it has been noticed that the burglars took away the DVR after attempting criminal act. Even installing the CCTV camera Singapore, the homeowner could not be able to identify the culprits. The recording of the evidence could not made available too. In fact, the surveillance system was itself on the risk of theft. IP camera surveillance system has enhanced the security because now your video is safe on the network.

The invention of IP camera has opened lots of options for the homeowners to monitor their home remotely. Now everything happening at home is directly on the watch. Similarly, the business community is more beneficiary of this wonderful invention. The safety of the recording and accessibility options has increased the demand of IP camera in Singapore. CCTV Singapore industry is focusing more on IP camera because it is more secured way of recording the evidence. With the installation of IP camera surveillance system, you can have complete piece of mind. You have best reliable security system, which never fails to produce evidence.

Hikvision & Dahua are the world’s leading CCTV camera, IP Camera and Video Surveillance Equipment companies. HikVision and Dahua specializes in video surveillance products and technology, HikVision & Dahua designs and manufactures CCTV and video surveillance products. HikVision & Dahua has products ranging from CCTV camera, IP cameras, HD-TVI cameras, NVRs and DVRs to video management software.

A reliable and secure safe box is the basic requirement of every home and office. Everyone needs a safe and secure place to keep his/her valuables and personal belongings. You need a safe box to lock and safeguard your confidential documents, which you do not want to share with other. Even, there may be some special documents or belongings you won’t want to share with your family members. The protection against unauthorized access to the personal assets and documents is the basic aim for having a reliable and secure safe box. Safety of the precious, personal, and secret assets remained the problems of human being in every era. In every era, the efforts to make a secure and foolproof safe box were made by the experts. During the current technology era, having a secure safe box is also the basic priority of everyone. The latest technology is being used for manufacturing secure safe box. Singapore lock and safe box are well known all around the world due to reliability and safety. The safe deposit box Singapore is focusing more on the quality and features of the safe. The basic aim is to make the safe more secure and complicated to prevent unauthorized access.

All possible measures have been taken to restrict unauthorized access to the safe box. Currently, key safe box, electronic/digital safe box and multi-lock system safe box have been introduced in the market. The advancement of technology has unveiled multiple options for the safe box manufacturer Singapore to make high-quality safe box and safe chest products. Brands of safe box includes Yale safeSentry SafeDiplomat Safe, Nika Safe, LuCell Safe.

server rack is a structure consisting of vertical columns and horizontal shelves that form a frame. This frame works as a special support for different kinds of computerized systems with special requirements. Server racks offer an excellent solution when it comes to find an optimal distribution, space saving and efficiency.

Keywords: HikVision, Dahua, CCTV Camera, IP Camera, wireless IP camera, CCTV SingaporeCCTV installation Singapore, HD-TVI CCTV camera from Hikvision, HDCVI CCTV Camera from Dahua, Nanny Camera, DVR, NVR, Digital Door Lock, Home Safe Box, Cloze Passage, Office Access Control, Yale Digital Lock, Fingerprint Lock, Digital Safe, Yale safe boxServer Rack

Copyright 2009-2025 SafeTrolley.com. Owned by Wise Group Pte Ltd. All Rights Reserved. CCTV Camera and IP Camera in Singapore. Buy Safe Box in Singapore. Server Rack Singapore. Access Card Duplicate. HikCentral Professional License