Time needed: 5 minutes
 Hikvision iVMS-4200 Client is the free version of the management software which allows for real-time live viewing, video recording, and event management of embedded network surveillance devices, such as DVRs, NVRs, IP cameras, Door Access Reader and Controller, Video Intercom system and other encoders. It also supports the time attendance reporting and door access records tracking function.
Refer to the below steps on how to use it.
- How to Use IVMS-4200 Client on PC
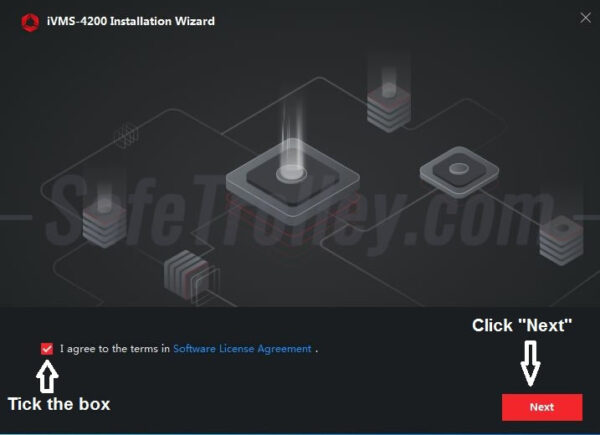
Download the latest version of iVMS-4200 Client here. After that, install the software and run the program to start the software installation.

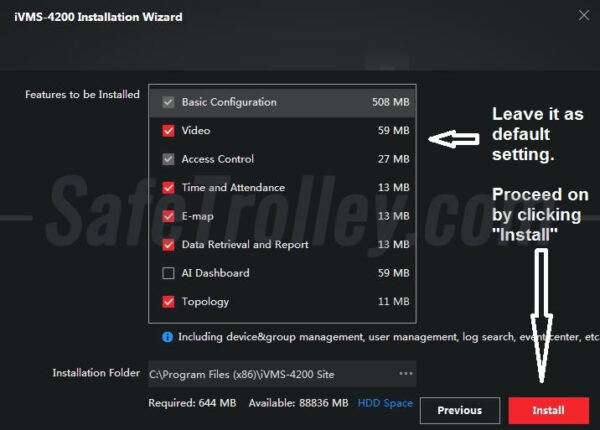
- iVMS-4200 Installation Wizard feature
You will see this page full of features but you just leave it as default. Continue by clicking Install.

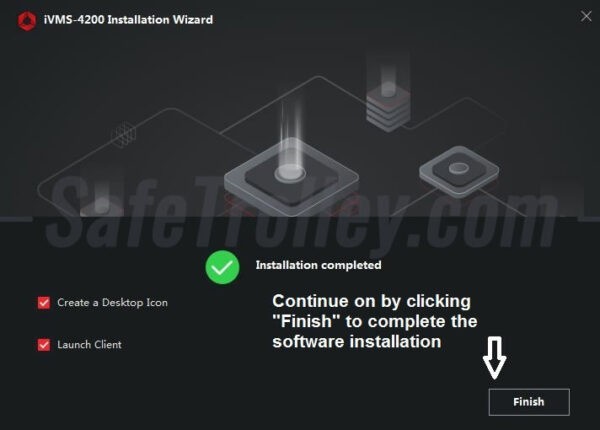
- iVMS-4200 Installation Wizard Completion
You will see this page showing you that you have already installed the software on your pc. Now click Finish to let it run the software.
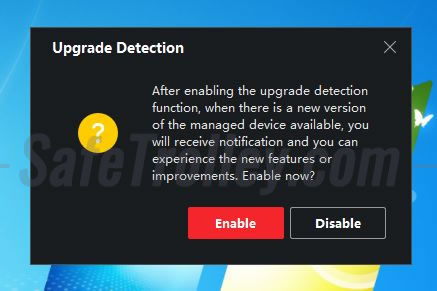
- Software Upgrade Notification
Choose "Disable" here.

- Software account creation
You will be asked to create user name and password. Note that the password is only for the iVMS-4200 Client software (not for the Hikvision NVR/DVR/IP Camera). So, feel free to set any iVMS of your own. Also, if it's your own PC, you can enable the Auto-Login feature to bypass the login page when you open the software.


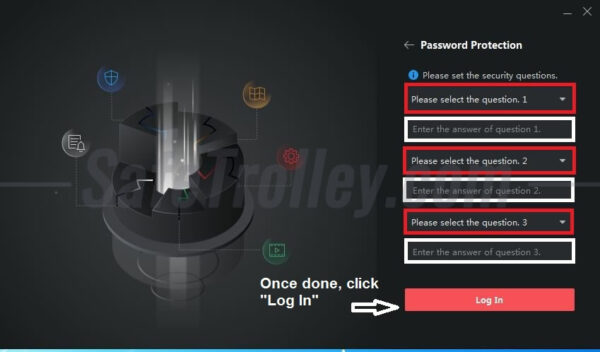
- Security Question for Password Protection
You will be asked to set answers to the security questions. The security question will be useful when you reset the password of the iVMS-4200 Client software (not the Hikvision NVR/DVR/IP Camera). Please set your own answers and remember them.

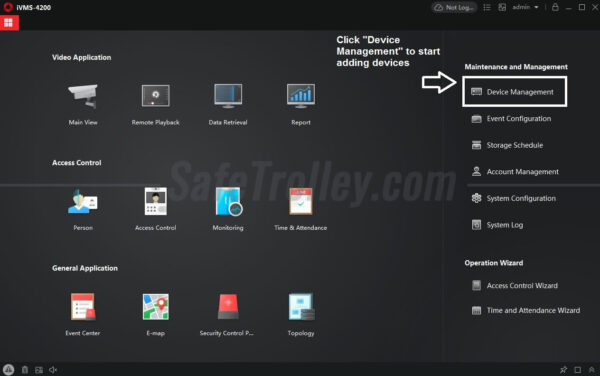
- iVMS-4200 Client Main Page
After you clicked the Log In, it will direct you to this page. Click the Device Management on the right side as shown below.

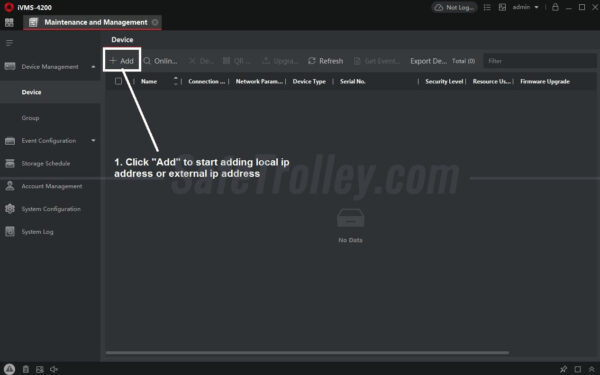
- Device Management
You can see the "Add" under Device category. Click "Add" to start adding your device address manually. There are two types of adding methods. You may need to check with your system vendor on which method is suitable for you.

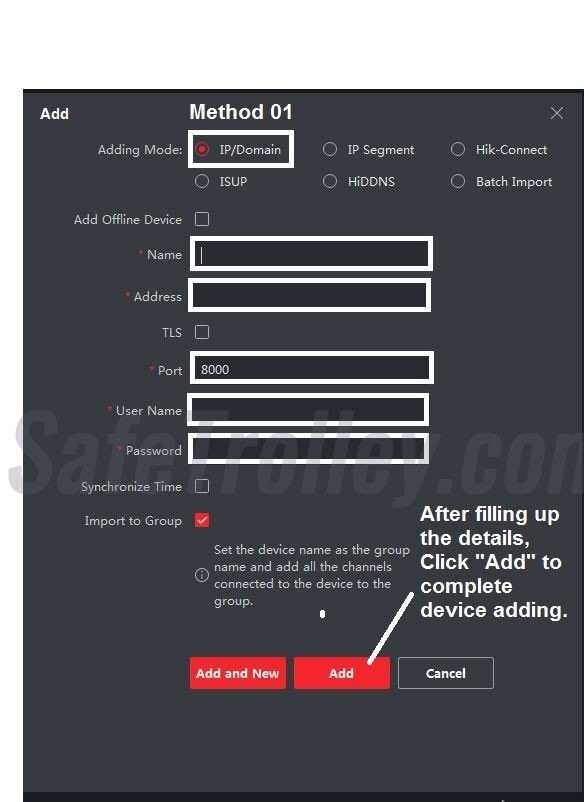
- Device Adding Method by IP/Domain
Select IP/Domain as adding mode. After that, fill up the details provided to you or you can refer back to your previous device/ PC. Once you filled up, you can click "Add" to finish the device adding.

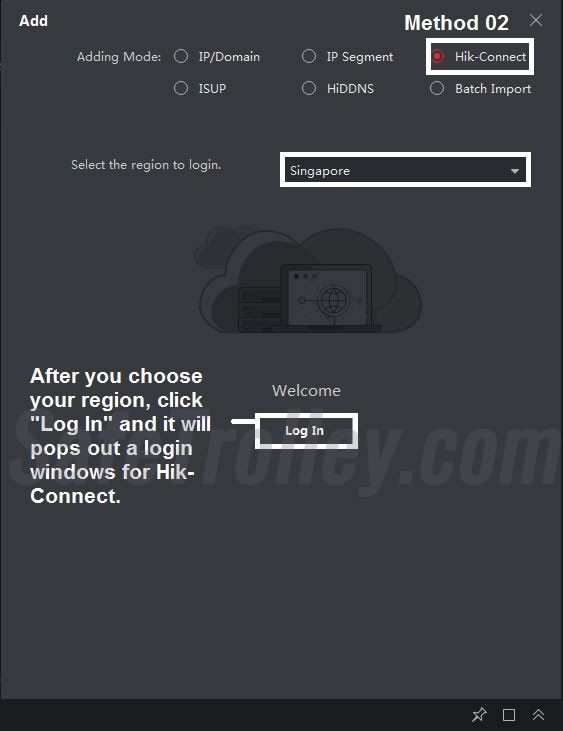
- Device Adding Method via Hik-Connect
Select Hik-Connect as adding mode. After that, choose your own region. Click "Log In" once you done choosing and it will pop out a login windows.

- Hik-Connect Login Windows
Username/Phone number(Recommended method, easier to remember).
a. If login via username, kindly note that the username is not your recorder username. The username is the Hik-Connect account username.
b. If login via phone number, please remember to insert 65 in front of your number. E.g : 6591234567
Password: your own password
After that, click Login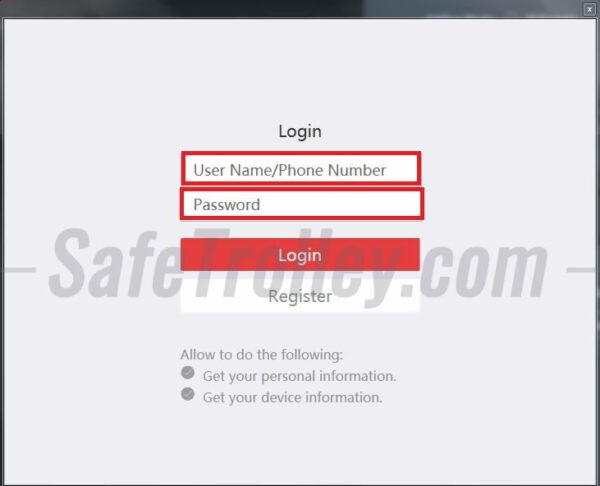

- Hik-Connect Login Interface
You will see this small pop up window telling you that you have logged in and Click Close


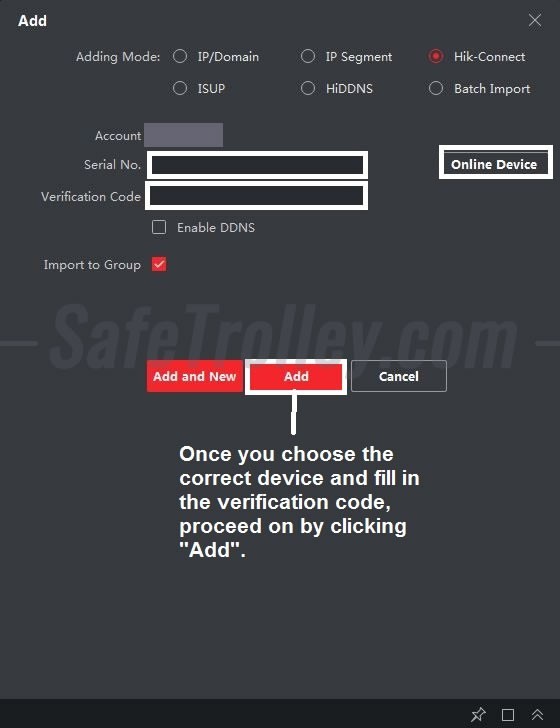
- Hik-Connect New Device Adding
Click the Online Device button on the right hand side, choose the device you wanted to add and it will appeared under Serial No column. Fill up the Verification Code which will be provided by your system vendor and Click "Add" to complete it.

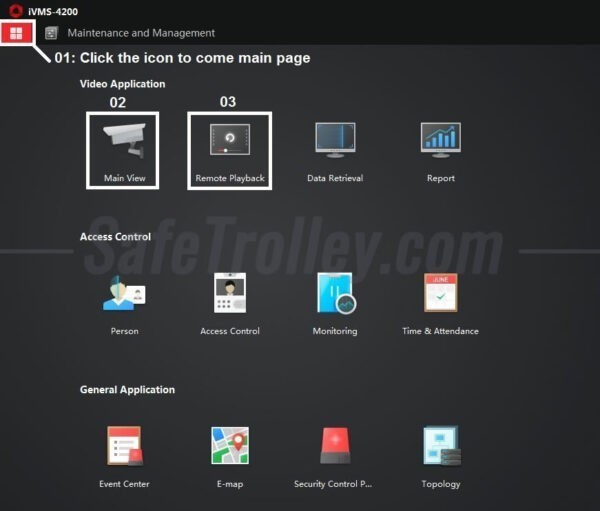
- IVMS-4200 Client Homepage
Click 01 to go Homepage; Click 02 to go Live View; Click 03 to go Playback

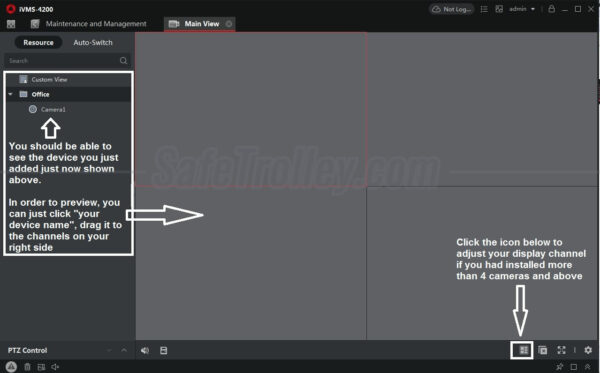
- Live View
Click the device you added on the left side and drag to the channels list on the right hand side

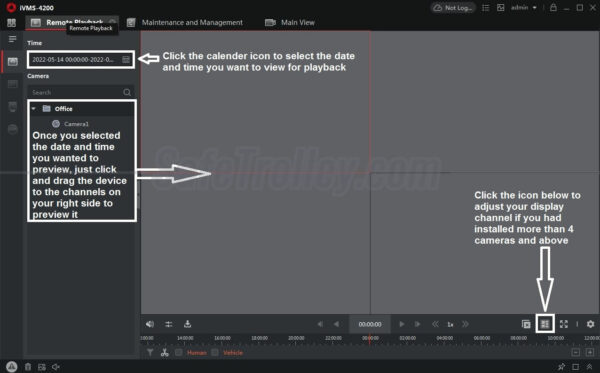
- Playback
Click the device you added on the left side > Select the date and time you want to view > Drag to the channels list on the right hand side to start viewing playback