Time needed: 3 minutes
Before proceeding with this guide, ensure that HikCentral Professional is already installed on your server. If it isn't, please refer to our installation guide to set up the software first: How to Install HikCentral Professional
Follow this step-by-step guide to access and view live and recorded CCTV footage on HikCentral Professional.
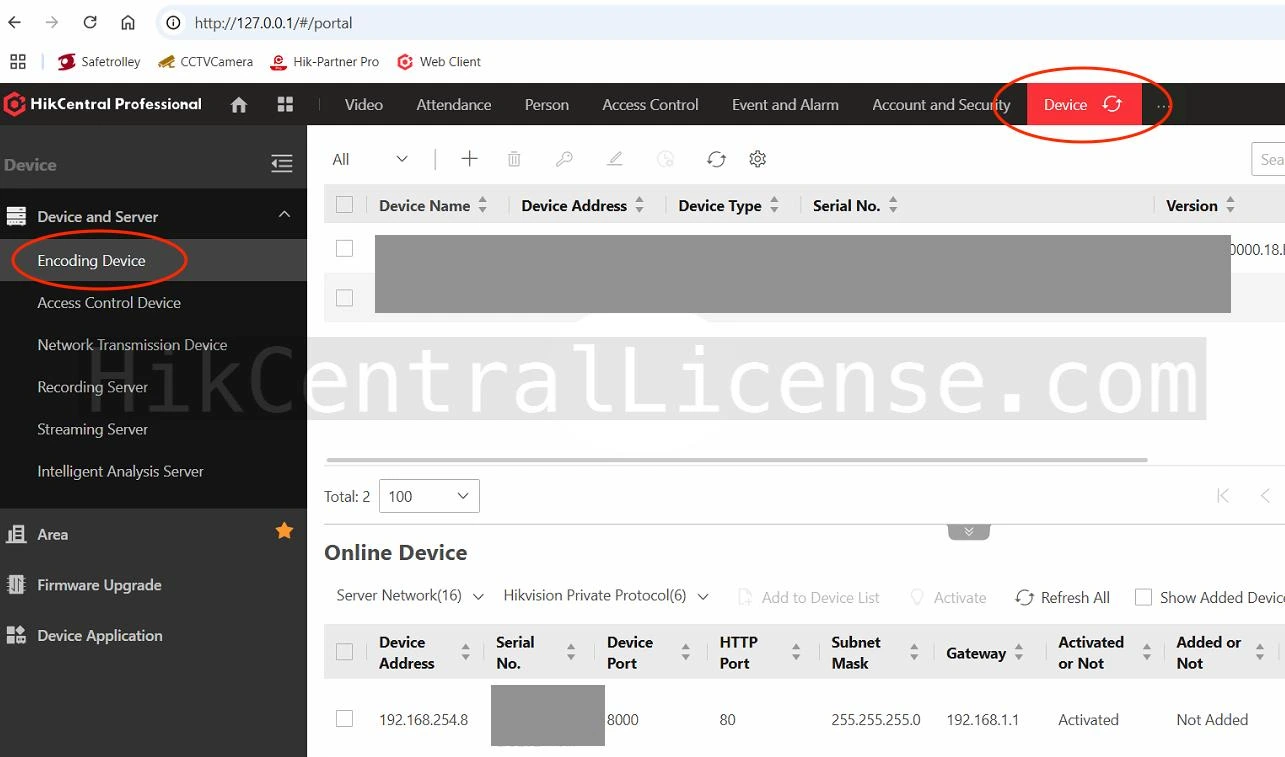
- Access the Encoding Device List
Open HikCentral Professional by entering the server IP address (or 127.0.0.1 if you are in front of the server PC). Then navigate to the Device menu at the top of the interface.
From the left panel, click on Encoding Device under "Device and Server."
If you are adding the local network Hikvision CCTV devices, you will see the list of connected encoding devices, including cameras. Verify that the camera's status is Activated and added to the system.
If you are adding remote Hikvision CCTV devices, you can do so via domain name, or ISUP.
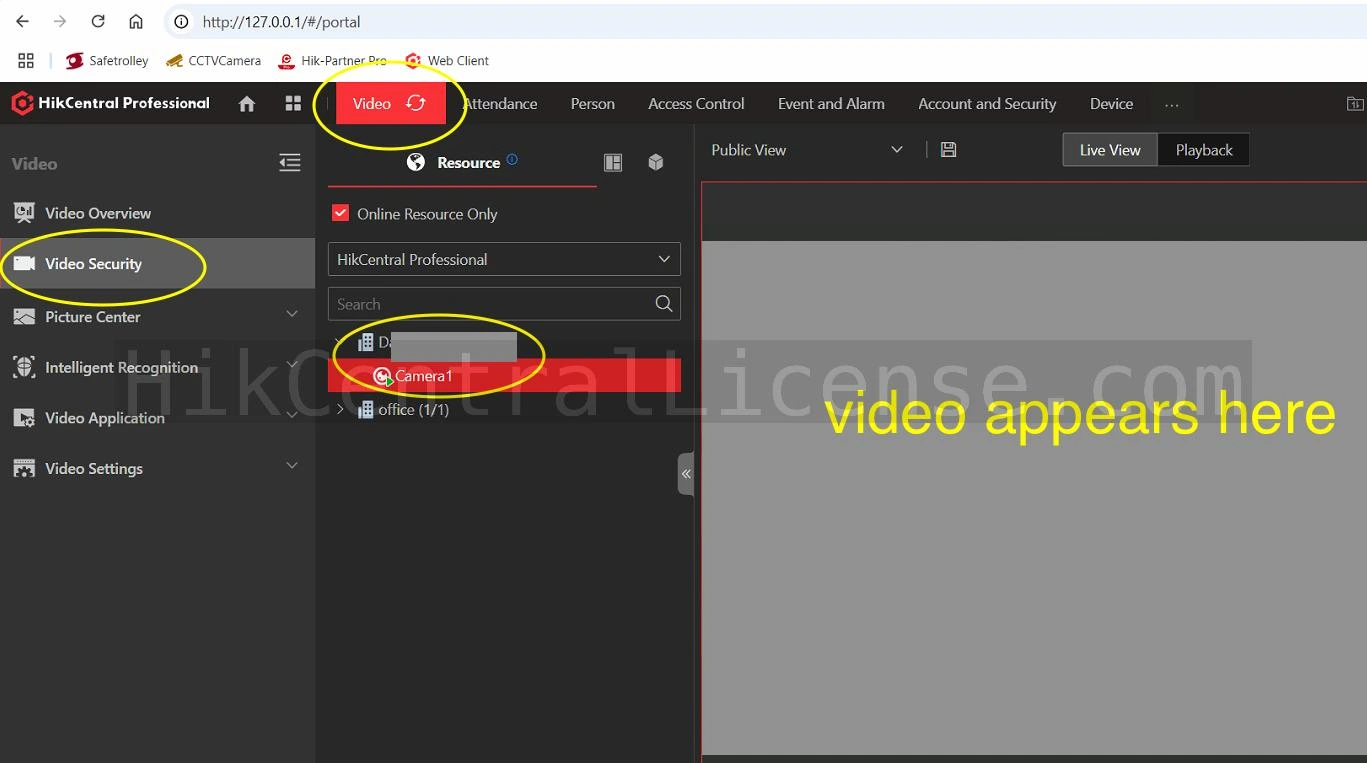
- View Live Video Feed
Go to the Video tab in the top navigation bar.
In the left-hand menu, select Video Security.
Locate the desired camera in the resource list. For example, "Camera1" will appear under the associated area or device group.
Double click on the camera name. The live video feed will display in the right-hand panel.
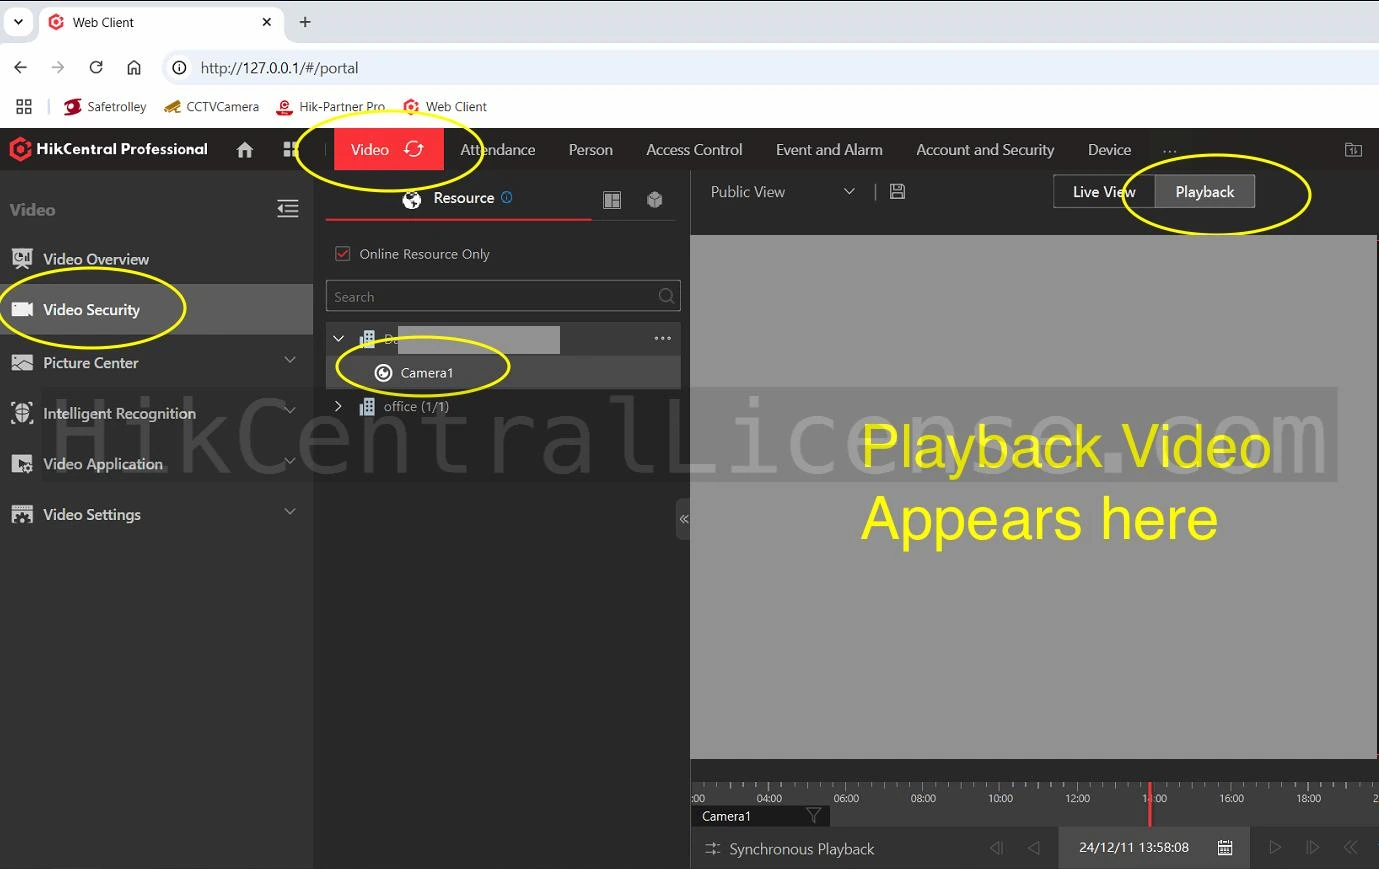
- Playback Recorded Video
Stay in the Video tab and ensure Video Security is selected.
Locate and select the camera you wish to review, such as "Camera1."
At the top right of the interface, switch from Live View to Playback mode.
Recorded footage for the selected camera will appear with a timeline at the bottom. Use the timeline to navigate specific time frames.
This process allows you to efficiently monitor both live and recorded CCTV footage.

